 TrapProof Training
All guides › Cities
Approving Haulers and Assigning Containers
What You Will Learn
By the end you will be able to:
- invite a hauler to your program, or approve one that asked,
- assign containers to an approved hauler, many at a time,
- decide whether restaurants may choose their own hauler,
- handle restaurant requests for a different hauler.
Before You Start
- Sign in as a municipal administrator. In the demo choose Municipal (Pat Delgado is an administrator). Other city staff can read the page but not change it.
How It Fits Together
Haulers apply to work in your program, or you invite them. An approval is called an agreement: it says a hauler may work in your city. You can assign a container only to a hauler with an active agreement. Ending an agreement unassigns that hauler's containers in your city, and is refused while the hauler has visits booked.
Step by Step
1. Open Haulers
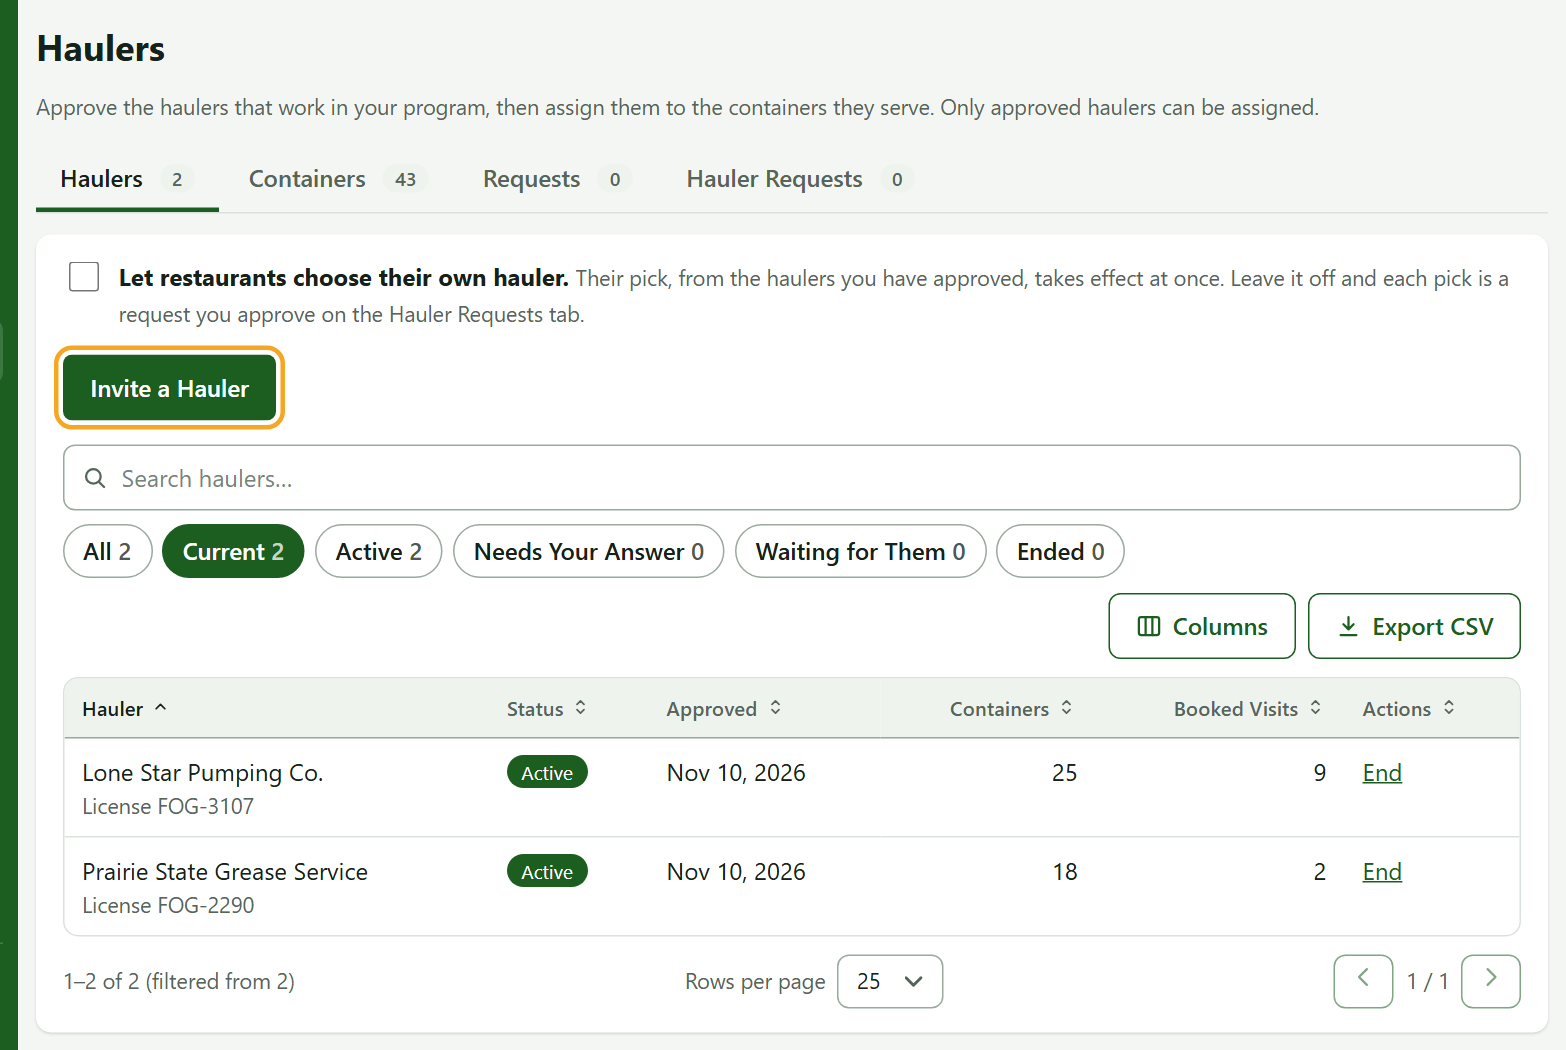
- Open Haulers. The Haulers tab lists each hauler with its status, when it was approved, how many containers it has and how many visits are booked.
- Needs Your Answer shows haulers that asked to join.
2. Approve or Invite a Hauler
- To answer a request, press Approve or Decline on its row.
- To invite one, press Invite a Hauler, type at least 3 letters of its name and choose it. The hauler's administrators are emailed. When they accept, it is approved.
- To remove one, press End.
3. Assign Containers
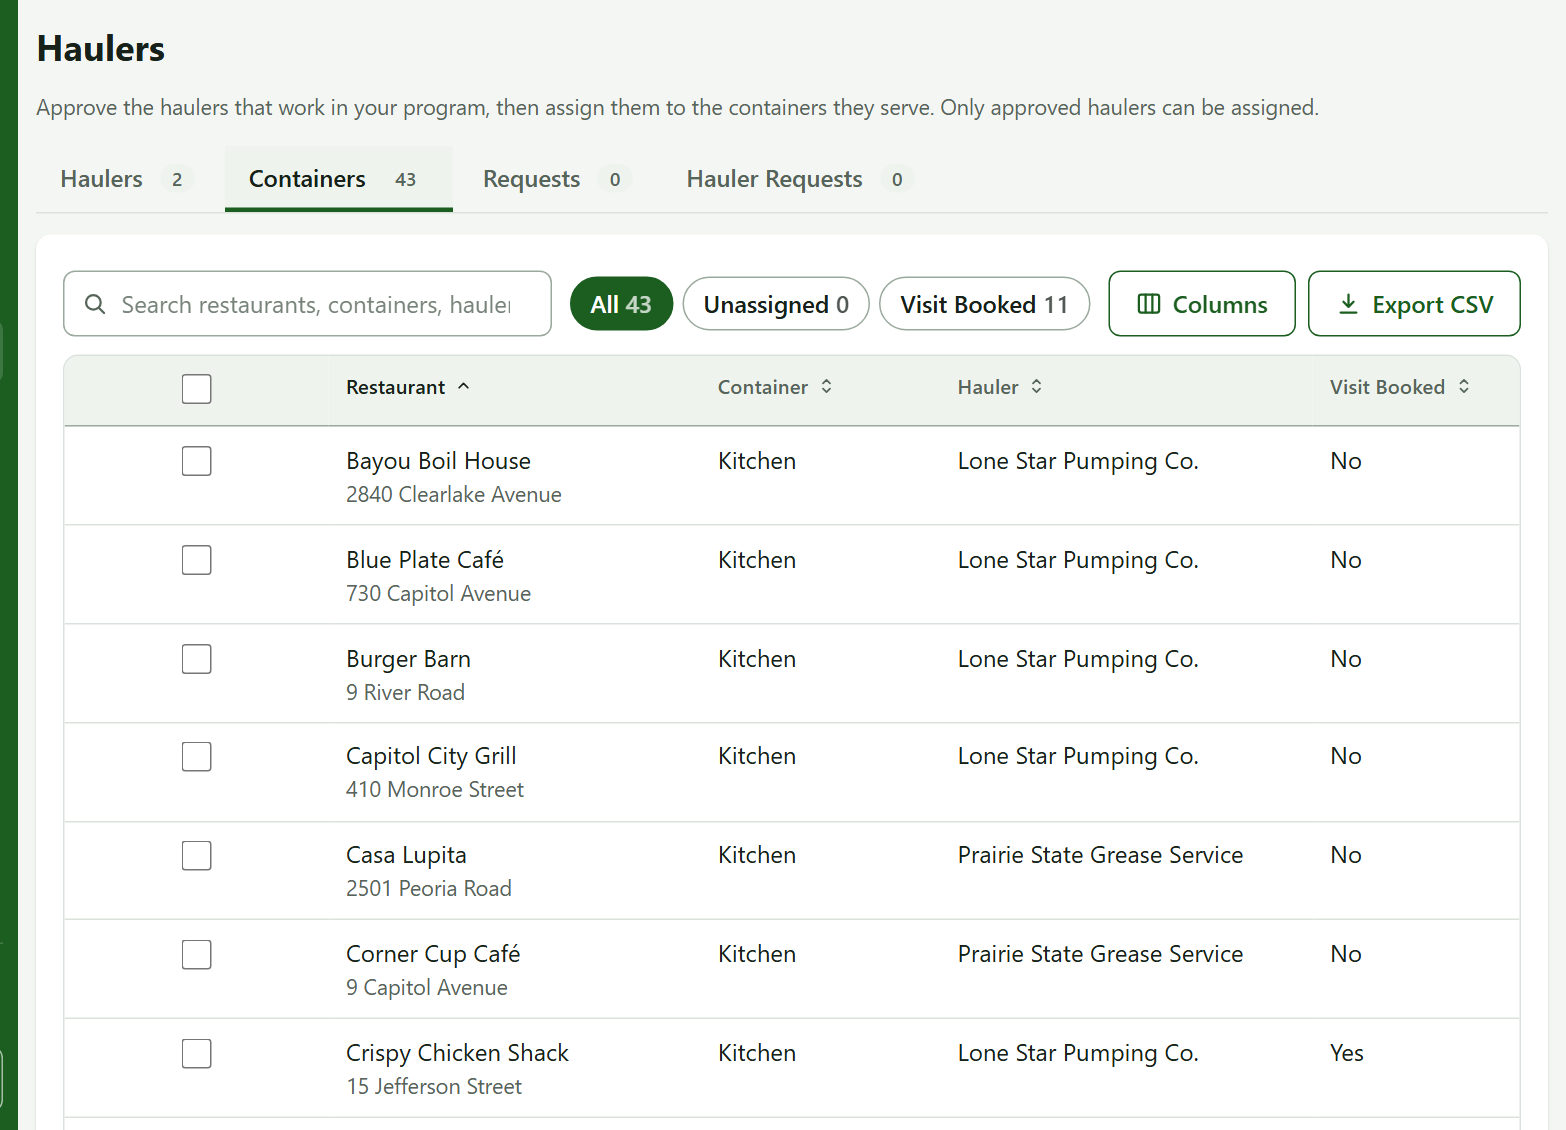
- Open the Containers tab. It lists every container with its hauler and whether a visit is booked.
- Tick the rows you want. Ticks survive paging and filtering.
- Press Assign Hauler and choose an approved hauler (or none to unassign).
- TrapProof reports each container: changed, unchanged, or skipped with a reason, such as a visit already booked.
You can assign up to 500 at a time. Any restaurant request for a different hauler is closed by your assignment.
4. Decide Whether Restaurants Choose
On the Haulers tab, the checkbox lets restaurants choose their own hauler from your approved list.
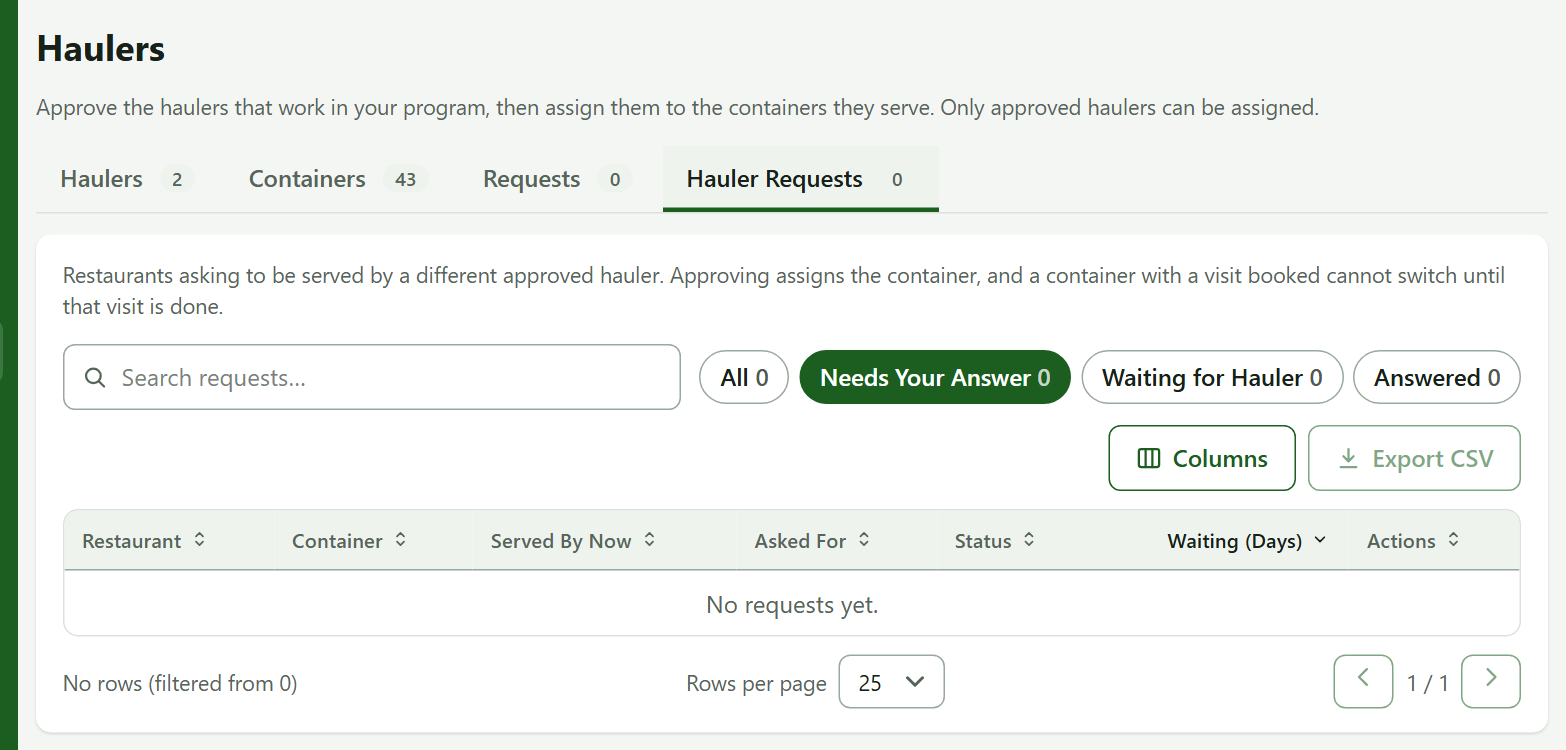
- Off (the default): each pick is a request on the Hauler Requests tab. Press Approve, or Decline with a reason.
- On: the pick takes effect immediately.
Either way the hauler must have an active agreement, the container cannot have a visit booked, and the hauler is then asked to accept the customer unless it accepts everyone automatically.
5. Watch the Requests Tab
Requests lists restaurants' pump-out requests: open ones and the last 30 days. Urgent, unassigned and three-days-old requests are flagged so you can step in.
Practice
- On the Containers tab, filter to a container with no hauler, tick it, and press Assign Hauler.
- Choose Lone Star Pumping Co.
You did it right if the container now shows that hauler.
Quick Reference
| To do this | Go to | Remember |
|---|---|---|
| Approve a hauler | Haulers, Approve | Only approved haulers can be assigned |
| Assign in bulk | Containers, Assign Hauler | Up to 500 at a time |
| Let restaurants choose | Haulers checkbox | Default is off |
When Something Goes Wrong
| What you see | Why | What to do |
|---|---|---|
| A container was skipped | A visit is booked | Assign it after the visit |
| End is refused | The hauler has booked visits in your city | Wait for those visits |
| A hauler cannot be found | Fewer than 3 letters, or it is not on TrapProof | Ask the hauler to request an account |